How To Roll A Joint Step By Step With Pictures. Joints offer a very natural and holistic smoking experience. They are light, portable, and easy to dispose of in case of emergency. Though they can often be wasteful, they remain a very popular choice among smokers. The Proper rolling technique makes the difference between a quality smoking experience and a mediocre one. Learn all about rolling joints by hand in this article.
How To Roll A Joint Step By Step With Pictures. Rolling The Classic Joint
Pros: Smoking from a joint allows for the remaining weed to act as a filter for your hit, reducing irritation. Some studies may suggest that the THC-to-tar ratio is lower for joints than other methods. They are small and discrete, so they are easy to take to public places and pass around.
They also look just like rolled cigarettes, so they are less obvious during car-rides or concerts. They require only marijuana and rolling papers, and in lieu of rolling papers.
Cons: They can be a hassle to roll and many people complain that the highs are not as good as with other methods. They can be slightly wasteful since the marijuana continues to burn while you are holding the joint. If you roll a lot of joints, you always seem to be out of Papers !.
How To Roll A Perfect Joint, What You Need
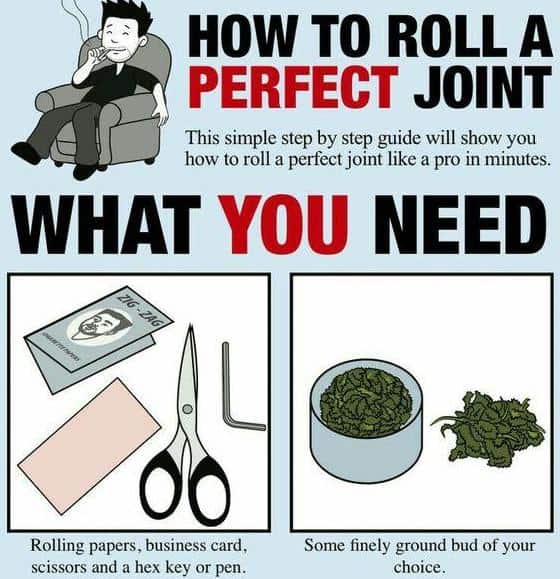
- Cigarette Rolling Paper to hold it all together.
- Business Card.
- Scissors
- Marijuana to stuff the joint.
- Cardboard for a filter.
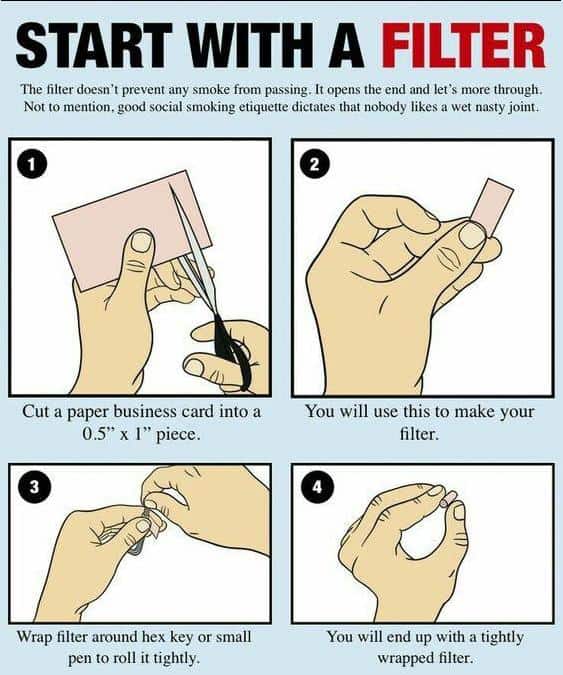
Start With A Filter
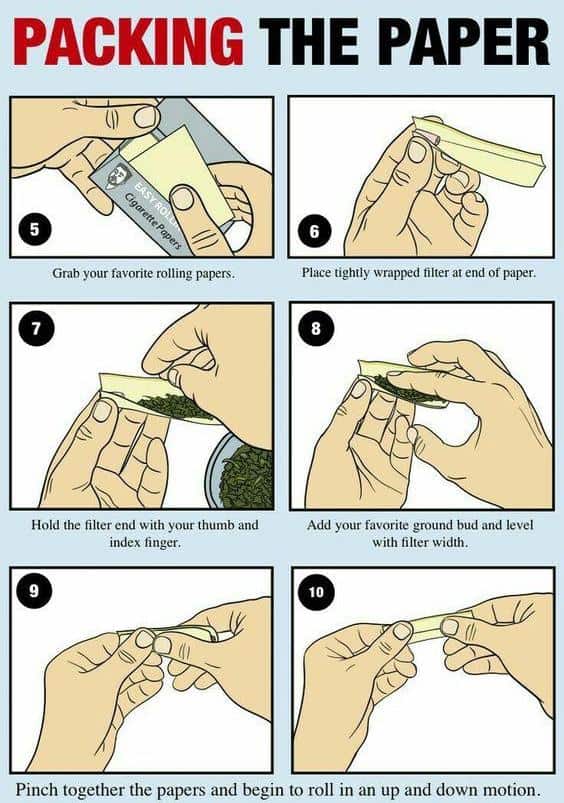
Packing The Paper
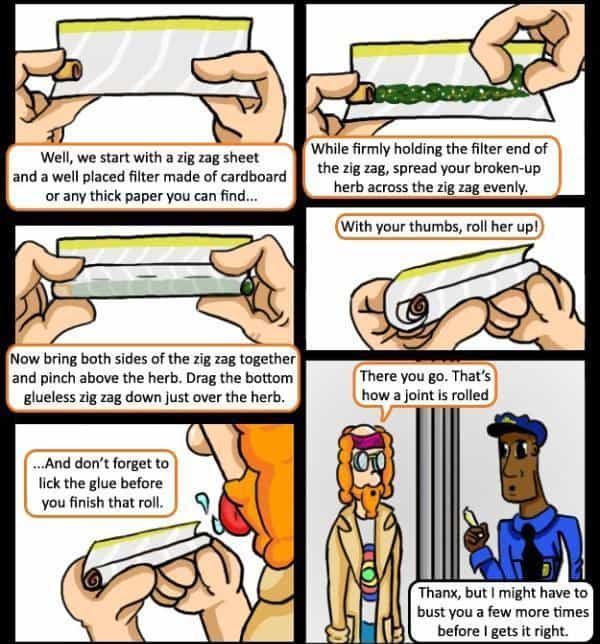
First, hold the paper gum strip up and away from you, and make a crease along the center of the paper.
Next, fill the joint with the marijuana leaving the ends slightly empty.
If you are using a cardboard filter, this is where you would place it into the joint.
Hold the joint with both hands towards the center and roll it back and forth, shaping the marijuana inside the joint into a cylinder. Don’t worry if some fall out of the ends, you can save it for later.
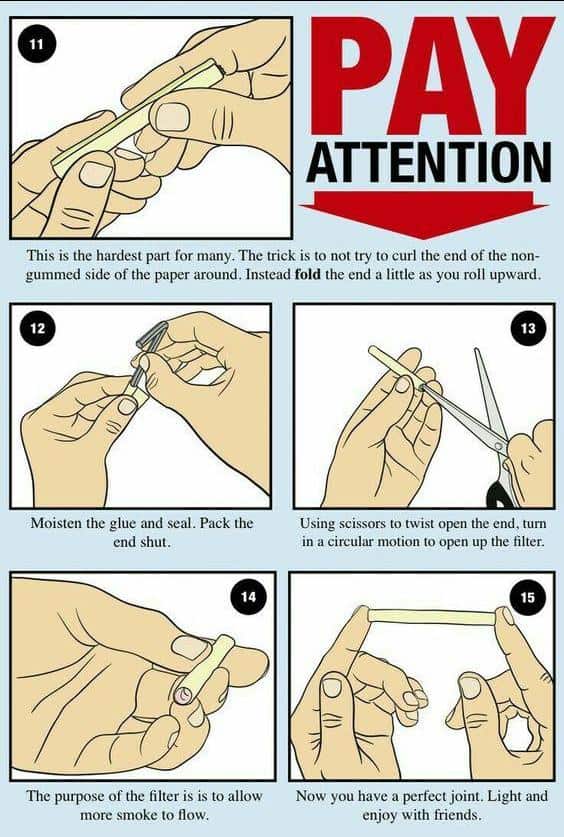
This is the hardest step. Hold the marijuana inside the joint with both hands and roll it to the bottom (without emptying it). Use your thumbnails to tuck the end of the paper behind the marijuana and begin rolling it upwards.
Continue rolling until only the gum strip remains.
Finally, lick the gum strip and seal the joint just like an envelope. If you are not using a filter, pinch and twist the ends to keep the herb inside the joint and enjoy. If you used a filter, only twist the open end.
Spark up and enjoy!
Smoking the Joint
This part is pretty basic, but it can be a little confusing at first! Smoking joints is similar to smoking cigarettes in many ways. If you twisted both ends when rolling the joint, begin by tearing or burning off one of the twisted ends.
This will allow the smoke to flow through the joint. Hold the open end in your mount and inhale while lighting the other side of the joint with a lighter or match.
Once the joint is lit (it should only take a couple seconds), you can inhale and pass at your leisure. If you find that one side is burning more quickly than another, this is called canooing.
The best solution for canooing is to lick your finger and wet the side that is burning quicker to slow the burn. You should ash the joint in an ashtray or another receptacle regularly to avoid dropping ash on clothing or furniture.
Tips and Tricks
The mix of marijuana used in the joint is very important. Be sure to break up the marijuana finely and consistently. Using a grinder helps. Remove all seeds and stems. If you are rolling a spliff, you may add rolling tobacco or tobacco from a cigarette.
Many people like to use filters. Filters can be made by simply taking a half-inch by a one-inch strip of cardboard (from the container the papers came in, cereal boxes, business cards, or almost anything made of thin cardboard) and rolling it into a small cylinder to fit in the end of the joint.
Don’t worry about small pieces of marijuana falling out of the ends as you roll. You can pick these pieces up and either put them back into the end of the joint or save them for later. If you choose to put the marijuana back in, you might need to use a pencil or something small to pack it in.
The way you distribute the marijuana in the joint defines the overall shape when complete. When first learning how to roll, straight joints may be all you can do, but cone shaped joints offer a smoother smoke. To roll a cone shaped joint, simply place more marijuana at the far end of the joint.